Showing posts with label Simple Sunday. Show all posts

Sunday, 19 January 2014

SIMPLE SUNDAY: Retro Fishtail

Nothing to Disclose

Hello lovelies!

SURPRISE! I have a post for you! I am probably on a plane right now, but I wore this look for a dinner out on Friday and I decided I wanted to share it with you.


PINK NAILS PINK NAILS WEE OO WEE OO. Seriously I don't think I've had pink nails since I was 10. I'm calling this a retro fishtail because the colours seems very... "70s wallpaper" to me.


This started with three coats of Mt Augustus (which is paler in real life, sort of a bright pastel pink with coral leanings), followed by two coats of Pastille for the upper fishtail, and one coat of Educate for the lower fishtail. Some studs, and done!

This shot gives you the shimmer in Mt Augustus, the holo in Pastille, and the green flakes in Educate.

Polishes used:
Elevation Polish - Mt Augustus (which I think got discontinued?)
Mentality Nail Polish - Pastille, Educate
Duri - Rejuvacote (base coat)
1.5mm studs from Born Pretty Store

Okay, now FOR REAL I'm leaving you all for a week. You can follow my adventures on Instagram, I'll try to post interesting photos about my trip there!

xo,

J.

Sunday, 17 November 2013

SIMPLE SUNDAY: Holiday Lights

Nothing to Disclose

I lied about avoiding holiday things. But I was seriously stumped, lovelies, I was!


You see, my prompt this week for my Follow the Devil ABC Challenge was N for Neon. NEON! There's a foot of snow on the ground outside (no, not exaggerating) (there may in fact be more than that) (it was -15˚C/+5˚F out today). How the bloody hell am I supposed to use neons at this time of year??


This was my answer. Holiday lights, loosely inspired by Sarah at Chalkboard Nails. (Hers are way nicer, naturally.)


I started this look with two coats of my trusty Camelot, followed by one thick coat of Masquerade for interest. I then dabbed on the white circles with White On (diluted in acetone) and a cotton bud, and dabbed Moon overtop of that for the glow effect (seen below). I painted the bulbs on using undiluted White On and my Nina Ultra Pro neons, used Seraphina for the wire, and topped it all off with top coat.


If I were to do this again, I would bother to dilute the neons with acetone and daub them onto the circles as well, for lighting congruity, but I didn't want to get overly complicated with a Simple Sunday design. I'd also recommend just using white acrylic paint and a tiny brush to do the wire, using nail polish made it way too thick.


Polishes used:
piCture pOlish - Masquerade (no longer available)
Sally Hansen - White On
Americal Apparel - Moon (glow in the dark)
Nina Ultra Pro - Punki Pink, Orange Flame, Solar Flare, Lime Light
Zoya - Seraphina
butter LONDON - Nail Foundation (base coat)
cotton bud
acetone for diluting nail polish
medium detail brush
tiny detail brush

I will try to make my next design less holidays-ish, more just plain wintry. Because, I assure you, I have plenty of inspiration in that department. Maybe I'll even do a mani for all your crazy Americans and your way-late Thanksgiving! ;)

xo,

J.

Sunday, 20 October 2013

SIMPLE SUNDAY: Blood Splats

Nothing to Disclose

Hello lovelies!

So, remember yesterday when I was worried about my being hung over today? GUESS WHAT.


I'm posting from the past again! The point of my inebriation levels of last night are totally moot! How smart is this? I should post from the past more often.


It's not a Hallowe'en season without some blood splats. Now, I need to have a word with you all, here. It's of critical importance, and should be known in a post-Dexter world. It's not really blood splatter, it's blood spatter. I know, I know. It's a bit like how the Classicist in me flinches whenever somebody calls them pottery shards instead of pottery sherds. Drives me nuts! Thank you for listening to this mini-rant.


This look started with a staggering four thick coats of Naked. It doesn't even give me mannequin hands! All that work for nothing! Needless to say, especially given its price tag (I got it on clearance, thankfully), Naked does not come recommended.


The accent finger is two coats of Chyna. This polish reminds me of Dorothy's shoes and does come recommended. So classic-looking in spite of the texture!


The blood splats (it's not really spatter, it's much more haphazard splotches, I think) were done first in Fire It Up, and then in JS42 for depth. The whole thing took about a half-hour for both hands, making this Simple Sunday appropriate.

Polishes used:
Deborah Lippmann - Naked
Zoya - Chyna
Layla - Softouch 08 (Fire It Up)
Nfu Oh - JS42
medium liner brush

Have you done any Hallowe'en manis yet? This feels so out of my comfort zone, haha!

xo,

J.

Sunday, 29 September 2013

SIMPLE SUNDAY: Fire Alarm!

Nothing to Disclose

Hello lovelies!

Today's look came about because I painted my nails with this gorgeous colour, Rusted Lux, and then had no idea what to do with it.


One of my Instagram lovelies suggested fire, and I kind of ran with it. In the direction of the absurd.


I took a look at my studs and thought, "Hey, these kind of look like exclamation points." And from there I decided on a fire signage kind of idea thing. You know, one of those idea things. Right-o.


Rusted Lux is a weird polish, it's a very sheer base with opaque flakes in it. The coverage of the flakes is what gives the polish opacity. I used three coats, but it could have used a fourth. It is amazing, though. Even my boyfriend grabbed my hand and exclaimed about how pretty it is. Glowy beauty.


Zoom this one in and you can see all the flakes in action!:


Polishes used:
SpaRitual - Rusted Lux
KONAD - Special Stamping Polish in White
butter LONDON - Nail Foundation (base coat)
Rica - Glossy Glam (top coat)
rectangular studs from The Nail Room
round studs from Born Pretty Store
medium detailing brush

xo,

J.

Sunday, 2 June 2013

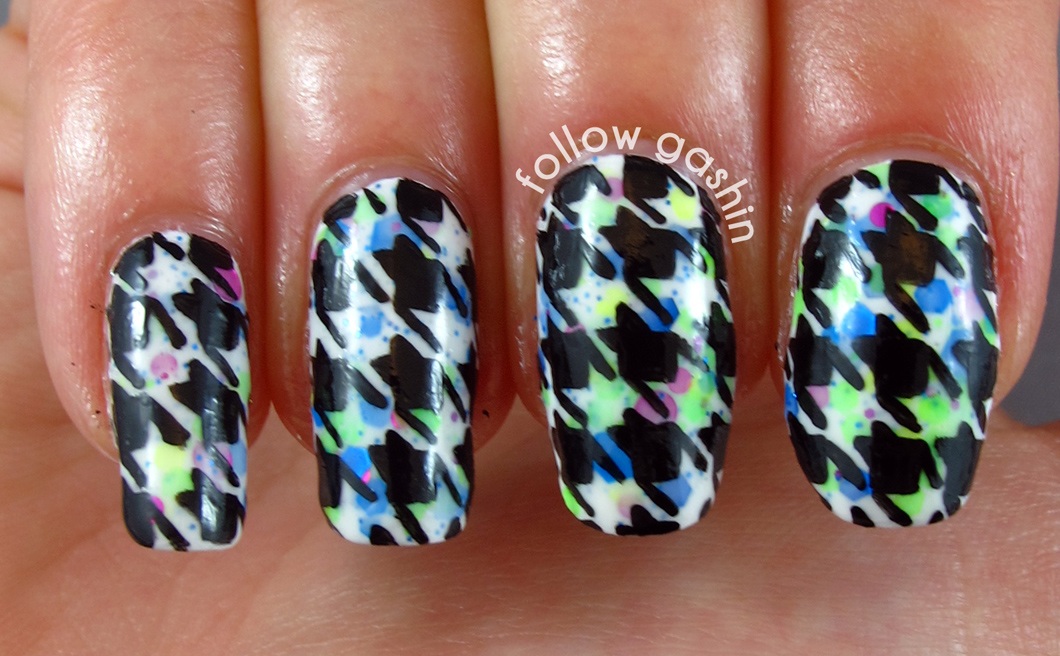
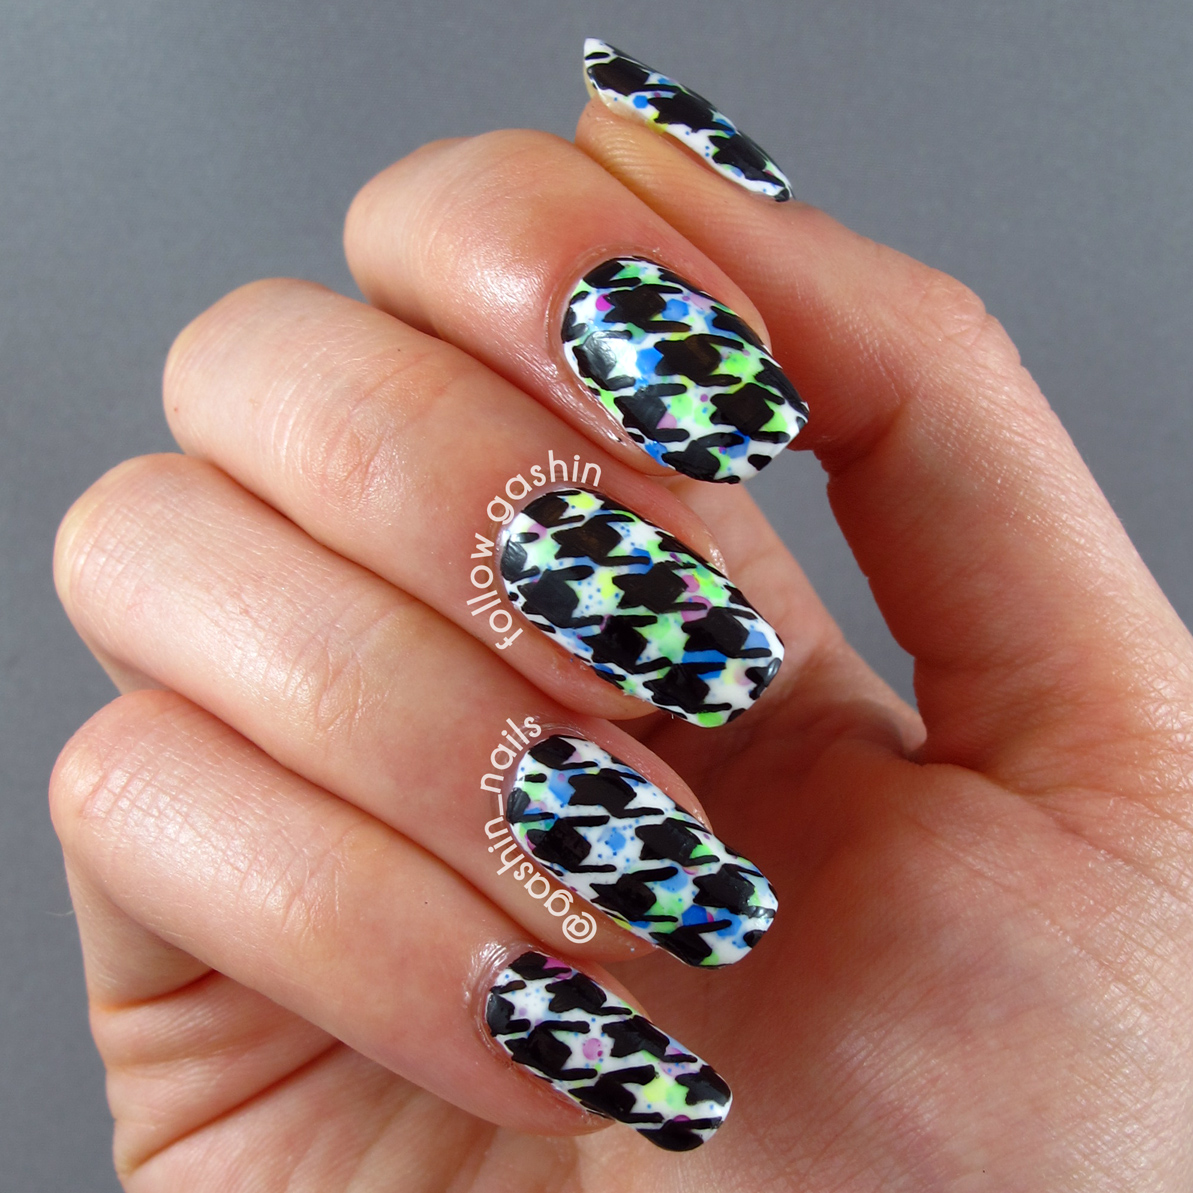
SIMPLE(R) SUNDAY: Houndstooth

Oh boy. It's 00:11 on Monday and I'm starting my Sunday post. Bad Jolène!!


Houndstooth is a weird pattern when you look at it, but it breaks down easily. There are a million tutorials for this one, but here's how I did it:


Step 1: draw your squares. You want them evenly spaced, so that it's a bit like a chess board where every second line of black squares was erased. That's a complicated way of saying what I hopefully have shown above.

Step 2: the first set of arms. Technically, the ends of the arms are supposed to be at an angle like fancy ribbon, but I challenge you to achieve that on the nail.

Step 3: the second set of arms. This should end up looking a bit like you're watching a bunch of block people doing the Macarena from above. (Good luck unseeing that.)

Step 4: the ears! So now the block people are looking up at you and they're actually CAT-BLOCK PEOPLE. I enjoy how my captions have managed to devolve into complete uselessness in only four steps.

That made sense, right????? Right. I'd make a pictorial for IG but it's clear by now that I do not function well without a staggering amount of words to throw around. Once you summon up the patience to do all your nails, you end up with something like this:


I did mine on a base of a glitter bomb for visual interest, but you could do it on anything. There are limitless colour combinations. I think it'd be really cool (but perhaps difficult) to do a houndstooth in a textured polish on a base of a similar shade of regular polish. Über classy!


Polishes used:
Cult Nails - Tempest (one coat underneath Rave)
black acrylic paint
detail brush

I think I will next do another post with a custom Tryst Lacquer, so keep your peepers peeled for that!


xo,

J.

Sunday, 12 May 2013

SIMPLE(R) SUNDAY: Paisley Print

This is technically Monday! But I'm still awake, so it's still Sunday as far as I'm concerned.


For this look, I began with a base of Play Me, sponged some Lil Miss Sunshine on the upper halves, and then did the paisleys using a small dotting tool, Honey Dew, and 1977. They are pretty messy little paisleys, I must say. But I wanted to keep it relatively quick in honour of Simple(r) Sunday.

Cleaning up Lil Miss Sunshine was unbearable, because it's a glass fleck/foil finish. So I apologize for the subpar clean-up job!!


This photo is all wonky in terms of skin tone, but it shows the shimmer in Play Me (and Lil Miss Sunshine) much more accurately than the two photos above. I recommend clicking it to zoom in:


I'm thinking that I'm going to tackle a contest entry tomorrow, so hopefully it'll turn out in reality as it is in my head! :)

Polishes used:
Duri - Rejuvacote (base coat)
Seche Vite (top coat)
small dotting tool
wedge sponge


J.

Sunday, 28 April 2013

SIMPLE(R) SUNDAY: Batfight!

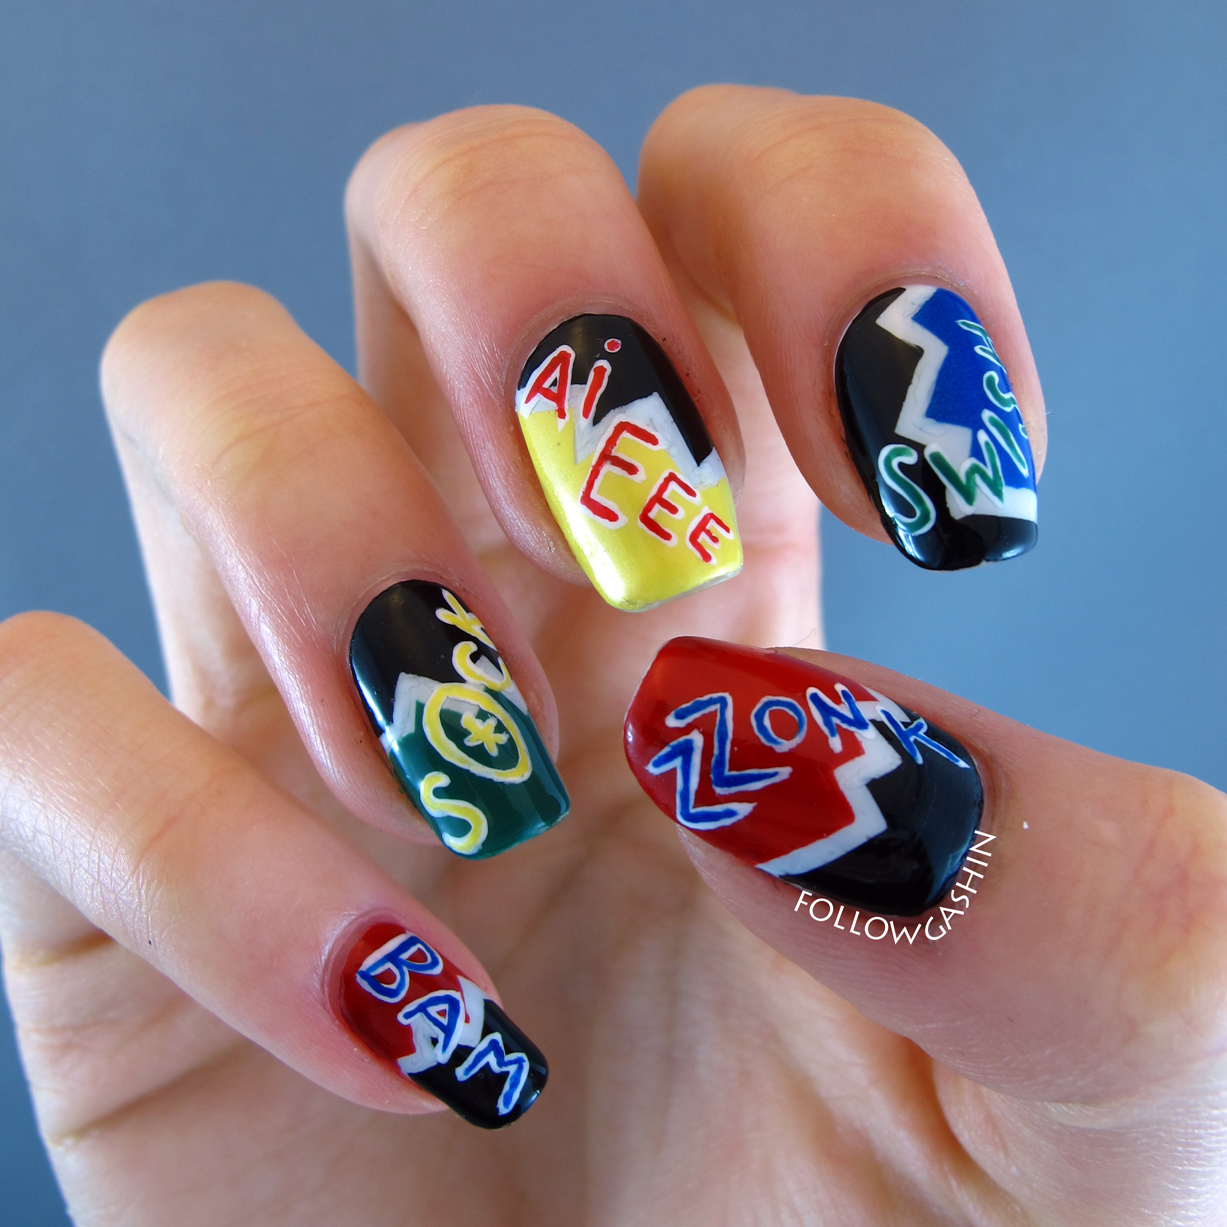
Today's nails were inspired by a few things: first, @glynnavyre on Instagram wanted to see explosion nails; second, I'm headed down to Calgary today for the Fan Expo; third, my friend Jen insisted, upon the occasion of our last hanging out, that we watch the scene in the good ol' Adam West Batman movie wherein he is struggling somewhat underwhelmingly with an inflatable shark affixed to his leg.


It was a good scene.

ZZONK is a real thing; I saw a screencap of it!!

To do this look, I used the explosion mani technique (YouTube it, it's all over the place) and simply added words in a combination of white acrylic paint and nail polish.

This is my favourite one.

Polishes used:
Layla - Velvet Effect 08
OPI - My Boyfriend Scales Walls, Jade is the New Black
Revlon - Electric
Zoya - Tallulah
GOSH - Nero
Duri - Rejuvacote (base coat)
Dior - Gel Coat (top coat-- AND LOOK AT THE SHRINKAGE, SWEET RHUBARB PIE)

All the delightful geekery in the world to you!


J.

Sunday, 24 March 2013

SIMPLE(R) SUNDAY: Fleur-y of Flowers with Purple Holo Stripe

I recently discovered a new-to-me polish brand from Canada: Tryst Lacquers. I snapped up Jaded, Fleur-y of Flowers, and Just a Crush. I've used Jaded by now (it's the background to my Yoda), and today I'm using Fleur-y of Flowers. I really can't say enough about how much I love these polishes. They are what happens when you take lovely crellies and mix in the perfect amount of micro and micronic glitter-- complexity without being overwhelming. I've included a bottle shot at the bottom to show you just how complex this pretty is.


I started with two easy coats of Fleur-y of Flowers (two medium coats or three very thin coats gives perfect opacity, and it self-levels well). Because I love the polish so much, I wanted it to be the spotlight, so I kept the accent nails bare. I then taped off the middle sections of my other fingers, and painted on stripes of (top to bottom) Euphoria, Lady of the Lake, and Misty Blush-- all purple-toned holographic polishes.


As it were, I am terrible at taping straight vertical lines on my nails, because they were a hot mess. I touched the sides up with my detailing brush.

To get an idea of the holographic goodness, we need flash!


As you can tell, Misty Blush is the most holographic of the three, and is a linear holographic. Lady of the Lake is a scattered holo, and Euphoria is a linear, though more subdued.

Here is a crappy phone pic to show you how this looked in the sun. It manages to be very eye-catching while still being very simple.


Lastly, that bottle shot I promised you. The frosty pale blue glitters are amazing, and the multitude of micronic glitter get me every time: black, blue, red, silver, gold... Just masterfully mixed, this polish.


Polishes used:
A England - Lady of the Lake
Layla - Misty Blush
OPI - Nail Envy Matte (base coat)
INM - Out the Door (top coat)

Thanks for reading, as always! I hope to cook up some really neat stuff for you this next week or two.


J.
 
SITE DESIGN BY DESIGNER BLOGS