Showing posts with label Spa Ritual. Show all posts

Sunday, 29 September 2013

SIMPLE SUNDAY: Fire Alarm!

Nothing to Disclose

Hello lovelies!

Today's look came about because I painted my nails with this gorgeous colour, Rusted Lux, and then had no idea what to do with it.


One of my Instagram lovelies suggested fire, and I kind of ran with it. In the direction of the absurd.


I took a look at my studs and thought, "Hey, these kind of look like exclamation points." And from there I decided on a fire signage kind of idea thing. You know, one of those idea things. Right-o.


Rusted Lux is a weird polish, it's a very sheer base with opaque flakes in it. The coverage of the flakes is what gives the polish opacity. I used three coats, but it could have used a fourth. It is amazing, though. Even my boyfriend grabbed my hand and exclaimed about how pretty it is. Glowy beauty.


Zoom this one in and you can see all the flakes in action!:


Polishes used:
SpaRitual - Rusted Lux
KONAD - Special Stamping Polish in White
butter LONDON - Nail Foundation (base coat)
Rica - Glossy Glam (top coat)
rectangular studs from The Nail Room
round studs from Born Pretty Store
medium detailing brush

xo,

J.

Sunday, 8 September 2013

Denim

Nothing to Disclose

Hello lovelies!

Today's mani is my attempt at denim nails.


This is another one of those looks I could do over with acrylics and just go bananas on the fabric's weave and the stitching. It's probably best for my sanity that I opted to do this with nail polish and a fan brush.


I started with one coat of Passport Blue, then used my fan brush to brush on Skylar and then Marble. The stitching was done with a detail brush using Passport Blue and Streetside NYC (because it is optimally opaque).


While I'm not convinced these look like denim, I do find the overall effect really pleasing. I would love to do this with other colours of 'fabric' and 'stitching'. IDEAS. MOAR IDEAS. I should actually write these down.


Polishes used:
American Apparel - Passport Blue
Zoya - Skylar
Spa Ritual - Marble
Duri - Rejuvacote (base coat) (did 2 coats to prevent staining, FYI)
fan brush
detail brush

It turns out I'm still not caught up! Gotta do my E prompt next. I think I'll leave these on for a day or two before tackling that one. :) I start exercising again tomorrow morning after three weeks of inactivity, wish me luck (I will sorely need it) (that was kind of a pun)!

xo,

J.

Thursday, 4 July 2013

Neon Brushstrokes

Nothing to Disclose

Hello lovelies! I'm on the fence about this one; maybe you can help me figure out if I like it or not.


I got this idea from Missy's somewhat similar brushstroke-ness-thing. I like hers way way WAY better.


For this look, I began with a gradient of Sacred Ground, Ridnitsohkka, and Tempest. I then did brushstrokes on top with Punki Pink, Solar Flake, Orange Flame, Lime Light, and Charisma. I topped it off with little studs from Born Pretty.


Polishes used:
Spa Ritual - Sacred Ground (this polish is amazing, if you do not own it you are crazypants)
Elevation Polish - Ridnitsohkka (being reformulated; restock due 7 August 2013)
Finger Paints - Punki Pink, Solar Flare, Orange Flame, Lime Light
Zoya - Charisma
Orly - Bonder (base coat)
black 1.5mm studs from Born Pretty

So, yea or nay? I honestly am not sure. I think I liked this in principle way more than in practice. At any rate. Until next time, my lovelies!

xo,

J.

Wednesday, 26 June 2013

Chalkboard Nails

Nothing to Disclose

... Not as in the extremely talented nail blogger. As in nails that are meant to look chalkboard-ish.


Doing chalkboard nails was the idea of one of my lovelies over on Instagram. I regrettably haven't run very far with it, but it's a fun look for when you're feeling lazy!


This look began with two coats of Camelot (best black ever), followed by some sponging of Marble for the dust effect, then Filthy Rich for the chalk holder along the bottom. Text is done with Tempest, and the whole is coated in two thick coats of Matte About You.


On the subject of which -- you notice the dots that are distinctly whiter and sharper than the sponging? Those are weird calcifications in Matte About You. Has this happened to anybody else? I have no idea what they're doing but I strongly disapprove. In this case, they sort of blend in, but I've had them nearly ruin a manicure before. Time to consult Missy's informative Iron Polish post on matte topcoats and get myself a butter LONDON matte topper, I think!


Can anybody guess what the equation is? Any maths nerds out there? Show yourselves, ain't no reason to hide! I'll write it below in white text, highlight it and read if you're hopeless at maths like me:

The theory of general relativity as formulated by our good friend Einstein. :)

Polishes used:
Spa Ritual - Marble
Quo by Orly - Filthy Rich
Essie - Matte About You (top coat)

I have some seriously awesome posts coming up in the next few days -- a W-themed mani, and another crack at paisley print, so I hope you'll look forward to those!

xo,

J.

Tuesday, 14 May 2013

Pretty Serious Turns 1! And so does Daphne!

Today, 14 May 2013, marks something momentous: the first anniversary of Pretty Serious Cosmetics. Excellent work, Kaz and the gang! To many more fruitful years! Χρόνια πολλά!

It's also therefore little Daphne's first birthday. To mark the occasion, Pretty Serious released a special edition glitter topper called Daphne's Birthday Party. It's a very fun mix of small glitters in various colours. To me, it reads more Mardi Gras than Christmas, and that's a good thing!


For this look, I did a gradient over Calm & Clear (I painted Calm & Clear over the first coat of glitter for a jelly sandwich effect), then painted on Daphne's name with Hallelujah. I finished it off with a little blue holo heart (not that the holo shows in the lightbox).


Polishes used:
Pretty Serious Cosmetics - Daphne's Birthday Party
Spa Ritual - Calm & Clear
Contrary Polish - Hallelujah
Layla - Ocean Rush (holographic)
PVA glue for base coat
Seche Vite - top coat
detail brush

I promised you a contest entry for yesterday, and I did indeed get it done, but I haven't taken photos yet! It'll go up this afternoon for sure. :)


J.

Wednesday, 20 March 2013

Distressed Patchwork Nail Art

Hey there!

I have a simple but extremely effective mani for you today. The 'patchwork' look has been around for a long time, but I was finally prompted to try it by Jeanette's gorgeous take on it over at The Swatchaholic. Hers is way, way, way, way³ more beautiful than mine. Her skill is as perfect as her nails are as perfect as her photography-- go check it out!

In the meantime, here are my efforts. :)

The colours show up best in the shade.

For this look, I started with a base of one coat of Filthy Rich, and then dabbed on the remaining colours in a way that seemed to make sense/balance everything out. I used all foil polishes with the exceptions of Filthy Rich (microglitter), Mermaid's Dream (microglitter in a frosty base), and Smolder (shimmer). I went over the dabs twice for texture and opacity.

SPARKLY


It involved a bit of clean-up at the end, but nothing serious. It's an extremely easy technique since it requires no tools other than the brushes that come with the nail polishes themselves!


Here are close-ups of Smolder and Mimi because I felt like the patchwork didn't really show their true awesomeness. Smolder has a deep beautiful shimmer that is actually duochrome (goes golden at sharp angles, could not capture it on camera). Mimi is a royal purple foil that has a hidden bright turquoise shimmer that caught me totally off-guard!

L-R: Smolder, Mimi.  Sorry about the crap clean-up, these were painted & tidied with my non-dominant hand. :)

Finally, I leave you with a purposely blurry shot to show you the shiny glory of the foil polishes. Even though you don't use very much for this technique (it works best when you take off almost all of the polish on the brush), it still packs a lot of colour punch!


Polishes used:
Quo by Orly - Filthy Rich
Zoya - Ivanka, Mimi
Spa Ritual - Conduit, Rusted Lux
Deborah Lippmann - Mermaid's Dream
Poshé (top coat)

Have you ever tried this look? If not, you really should. It looks super-lovely in jewel tones, brights, pastels... any given colour family. Just keep an eye out for light/dark and colour balance!

Until next time!


J.


follow gashin on bloglovin

Wednesday, 13 March 2013

Retro Spaceships! (Kind Of.)

I have a fun one for you today! Unfortunately, it is irredeemably cloudy out, so my photos aren't their best, but hopefully it's possible to get the gist of it.


I had this idea in my head as a pure exercise in geometry, but my partner saw them upon completion and announced they looked like old school space capsules. Which is, I guess, kind of true! So I added some dots to the background at the last minute, to resemble stars, and called it a day.


I love this thing.

I started with a base of Cape Liz (3 coats to opacity); lovely formula, unfortunate that I couldn't get a photo that shows its beautiful multi-coloured glass fleck finish. I then sponged Marble on the top halves, and learned the hard way that it is IMPOSSIBLE to clean up this particular polish-- it just disintegrates into a million little sparkles that stick to your skin forever (augh).


I then cut out the shapes in tape and stuck those pieces of tape on my nails, followed by two coats of Euphoria and the swift removal of the tape while the polish was still wet. Lastly, I glued on the little studs, made the little white dots with a small dotting tool, and covered the whole thing in Glitter Food and topcoat.


And a super-overexposed photo to show you the holographic goodness of Euphoria. (It also shows up in the sun, but is too subtle for cloudy conditions.)


Polishes used:
Spa Ritual - Marble
Konad - Special Stamping Polish (White)
OPI - Nail Envy Matte (base coat)
New York Color - Grand Central Station (top coat)


Hoping to do something really awesome for the end of this week, stay tuned!


J.

PS: DUN DUN DUNNNN:


Monday, 25 February 2013

Failwhale February

So, this month was an exercise in nail-based humility. I could do no right. (Insert anguished gestures here.) I tried a bunch of things, and none of them worked as I wanted them to. Serves me right, probably, for the beginner's luck of completing the last objective.

FIRST: I MASSACRE OH SPLAT!

I lemmed Oh Splat! from the moment I first saw it. It's white-and-rainbow nail polish perfection. And then I went and screwed it up.

KILL IT WITH TOPCOAT

I attempted a swap mani of Oh Splat! and Orbital, with French tips in Order of the Garter. I figured this would work because A England polishes are outrageously pigmented and opaque. Order of the Garter, though a beautiful blue, needed two hefty coats to achieve opacity, by which time I was doomed to Bubble Tips™, which were only made worse by the thick coats of Seche Vite I needed to smooth out the ridiculous shelves of polish (and what do thick coats of Seche Vite always do? MICRO BUBBLES, augh):

I think my cuticles are screaming here?

Next time, I leave these beautiful glitter bombs the hell alone.

Polishes used:
KBShimmer - Oh Splat! (3 coats, works beautifully on its own)
Different Dimension - Orbital (3 coats, would recommend 2 on top of black undies)
A England - Order of the Garter (2 mortar-esque coats)


SECOND: I BRING SHAME UPON THE HOUSE OF JELLY GRADIENTS

This would have been excellent in theory, and I know how to fix it in future (a palette, a bottle of clear polish on standby, and a lot more time). I opted for a skittle mani in jelly gradients over a holo base. (I couldn't get direct sunlight, but trust me that Nfu Oh 61 is crazy-rainbows all ova the place in the sun.)

CLAWHAND

The OPI jellies are too pigmented for a smooth gradation. The Zoyas were a bit better (Frida in particular), but the net result was still too choppy for my perfectionism. Next time, I custom-mix the jellies with extra clear polish, and I work in reverse (i.e., wash of palest colour from the cuticle to the tip, and overlap layers building towards the tip, instead of the standard process of doing the tips towards the cuticles).

insert a pun about choppiness here

Polishes used:
Nfu Oh - #61 (2 coats, with Aquabase base coat!)
Zoya - Paloma (thumb), Katherine (index), Frida (ring)
OPI - Guy Meets Gal-veston (middle), Houston We Have a Purple (pinkie)


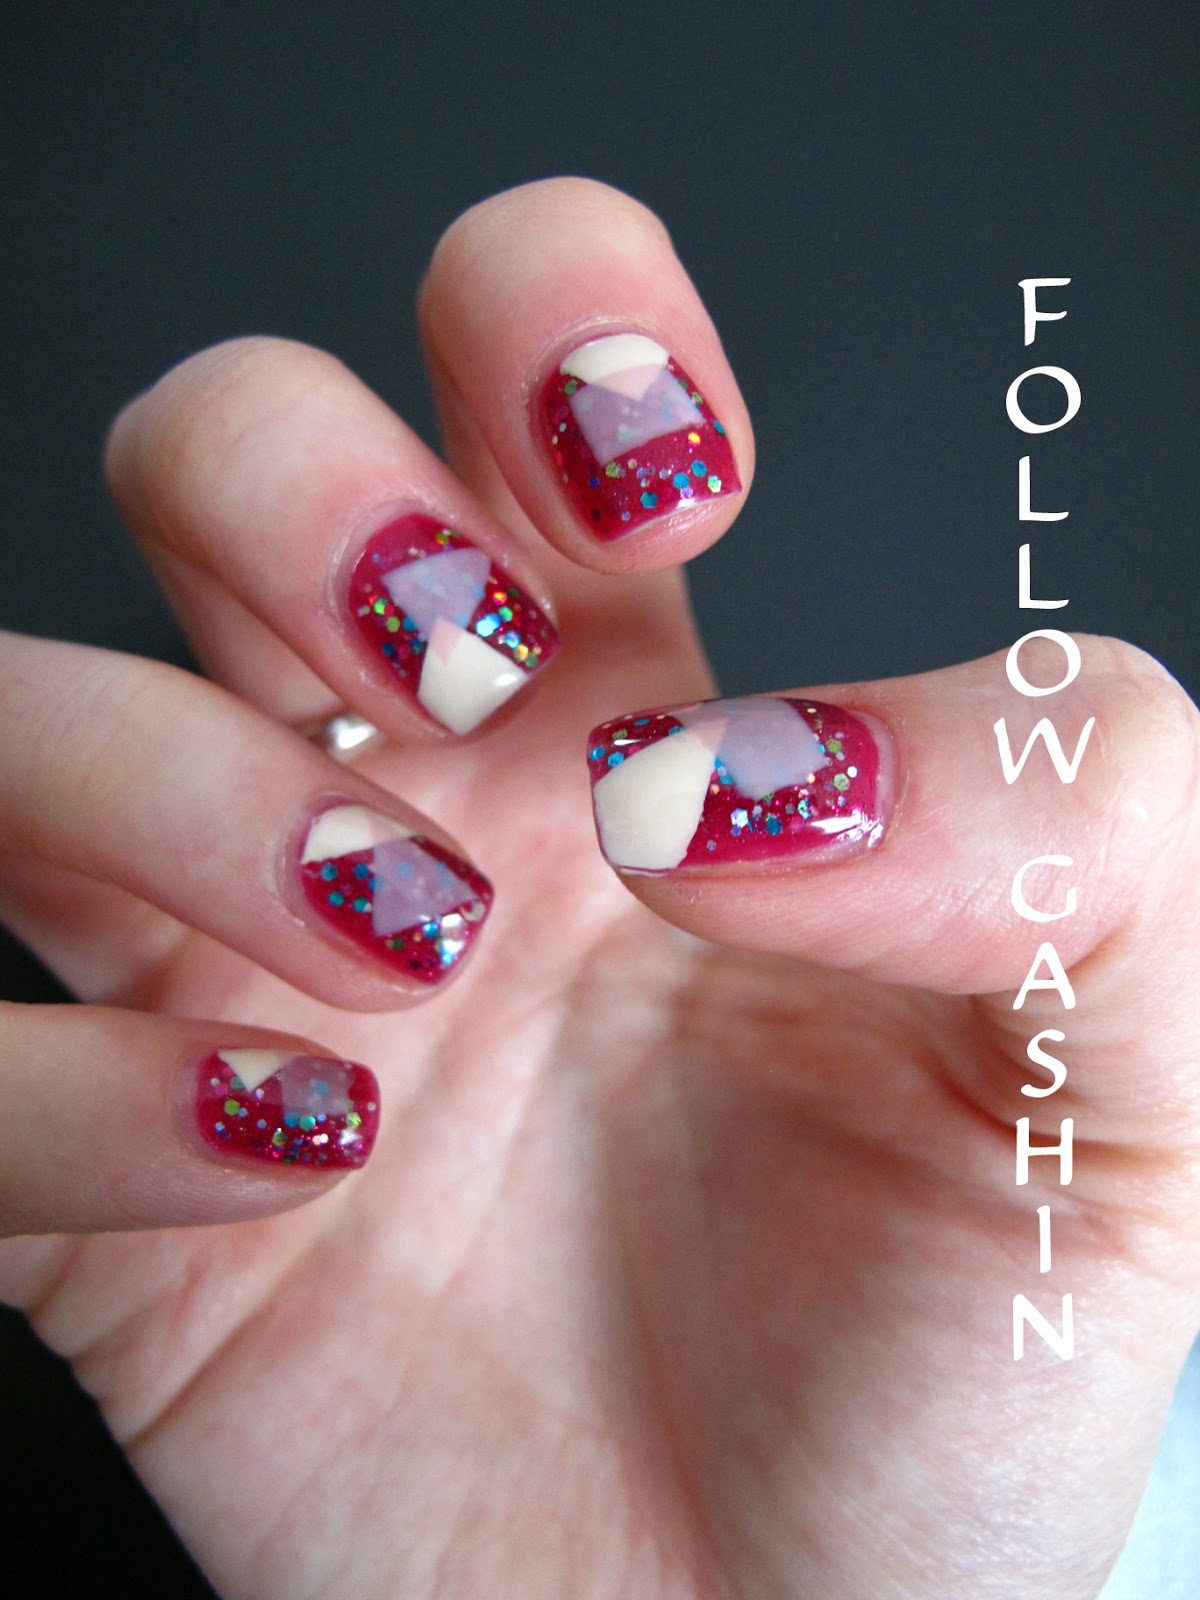
THIRD: I DO INJUSTICE TO NAILSIDE'S 80s PATTERN

I love Nailside's abstract 80s tutorial. I think this look is genius. I definitely plan to try it again in future, having learnt: 1) do not mess with the shapes, the triangle definitely looks best in the middle; 2) for the love of baby sloths, don't do nail art on top of a glitter bomb.

Okay, in this, my cuticles are definitely screaming at me, I can hear them.

The three coats of nail polish I needed for the base made it super-thick, and with the taping on top and the top coat to smooth everything out, it was a bit of a gong show. Satellite is a fantastic, gorgeous glitter-- it goes on well (I used the dabbing method but it was not at all finicky), it sparkles like our fates depended on it, and it's bright enough to run the show. I just couldn't leave well enough alone!

Also, for reasons that escape me, my Good to Go decided that it wanted to mimic Shrinky Dinks (can you believe they named them that? who rubber-stamped that?) and came up with the most outrageous shrinkage I have ever seen. I don't even have words for this. It's like the nail polish was trying to run away from my fingers...

That's, like, a sixth of my nail plate! Come back here!!

Polishes used:
OPI - Houston We Have a Purple (2 coats)
The Polish Bar - Satellite (1 coat)
Zoya - Jacqueline (1 coat; the opaque shapes)
Spa Ritual - Calm & Clear (1 coat; the translucent shapes)


And on that note, I'm off to bed. I have something hopefully better to show you tomorrow!


J.
 
SITE DESIGN BY DESIGNER BLOGS