Showing posts with label Dior. Show all posts

Friday, 15 November 2013

DIGIT-AL DOZEN WEEK: Black & White Lined French

Nothing to Disclose

Hello lovelies! Saved you the best for last.

At least, I think they're the best. I may be biased, though, because this look was done before the move, when my nails were in their long, squoval glory. Oh, how I miss them. GROW, NAILS, GROW!!!


You know, I only noticed that the lines on that one stud were facing the wrong way after I'd taken photos, so I'm going to pretend it was on purpose.


This look started off with a coat of Nail Foundation and a coat of Nail Glow. Once dry, I taped off the French tips with those sticky guide thingies (you know the ones), and sponged on a gradient of Tempest and, if memory serves, Recycle. I then removed the stickies, used Camelot to freehand on the thick lines, and topcoated/stuck the studs on.


At the time, the following ring was brand new to me, so I had to include it in photos. Mostly because it's by Bliss Lau, and she rocks killer geometric nail art like this all the time.

Ooh, aah.
I really AM pretty happy with these. Better than the last time I tried this, don't you agree?


Polishes used:
China Glaze - Recycle
butter LONDON - Nail Foundation (base coat)
Dior - Nail Glow (base coat)
studs from The Nail Room (a word of note: these come holo-looking, but acetone removes the holo)
liner brush
cosmetic sponge (for the gradient)

I can't believe that's it for another rendition of Digit-al Dozen week! Where does the time go? Next month is full-on festive, so you've got a month to whip out your Non-Denominational Wintery Holiday decorations and get in the spirit! (And I promise not to mention anything more about said N-D.W.H. until then!!!)

xo,

J.

CHECK OUT WHAT THE OTHER TALENTED LADIES OF THE DIGIT-AL DOZEN ARE UP TO:


Wednesday, 16 October 2013

DIGIT-AL DOZEN WEEK: Fall Leaf Skittle

Nothing to Disclose

Hello lovelies! Today's my favourite of all the skittles I did for this week. I really, really adore it. That's why I took, like, a meeeellion photos of it.


Sorry about the staining. I did what I could to mitigate it. :)


This look started with a coat of Rejuvacote and a coat of Nail Glow. Everything on top is done with acrylics and my tiny detail brush.


From thumb to pinky, the leaf types are: maple, oak, elm, poplar, and birch.


Gah, I've run out of things to say! Time for filler. Today was very busy. My partner had a new house built and we went for the inspection today (possession date is next Wednesday). It took two and a half hours! But it's good they were thorough, right? It's the kind of thing you want someone to be thorough for.


And then I got my hair did (woot woot), and I went to pastels class, where bales of hay whooped my keester. Like, really. I got my derrière handed to me by some hay bales on a bed of grass. I'd post photographic proof but I'm too ashamed. I'm going to keep working on it, I think, to see if I can salvage it.

Polishes used:
Duri - Rejuvacote (base coat)
Dior - Nail Glow
acrylic paint
tiny detail brush

I can't believe tomorrow is the end of Digit-al Dozen week! My inaugural one! I will save my tears of joy for my next post. ;)

xo,

J.

CHECK OUT WHAT THE OTHER TALENTED LADIES OF THE DIGIT-AL DOZEN ARE UP TO:


Tuesday, 17 September 2013

Lined French

Nothing to Disclose

Hello again lovelies!

Two posts in one day because I've got something very simple and kind of out of the ordinary for you.

I wanted to take on the challenge of doing a French mani in an interesting way, because they've never held any appeal for me before. This is what I came up with:


Things I learned from this adventure:

1) I am crap at linework;
2) I need to thin my Glitter Food.


For this look, I began with base coat and a coat of Nail Glow. I then freehanded the moons in Gossip Over Gimlets, did the exaggerated French tips in Recycle (using French tip guides, because whoa let's not be over-ambitious here), and the linework in Tempest (which also needs to be thinned). Topped it all in Glitter Food for optimal smoothness, and top coat to finish it off.


Polishes used:
Duri - Rejuvacote (base coat)
Dior Couture - Nail Glow
China Glaze - Gossip Over Gimlets
Rescue Beauty Lounge - Recycle (which is a beautiful dark green, but not as dark as pictured)
liner brush

I could see a better-executed version of this being a really classy look for a cocktail party or other style-forgiving event. It holds up on its own without being too complex. :)

I bought a Marc Jacobs polish today that is literally the least me-like polish I now own, and my next challenge is to incorporate it into a mani! Eep!

xo,

J.

Friday, 10 May 2013

Candied French

Hello! I thought this one would be easy to knock out both hands in a couple hours, la di da.


FALSE.


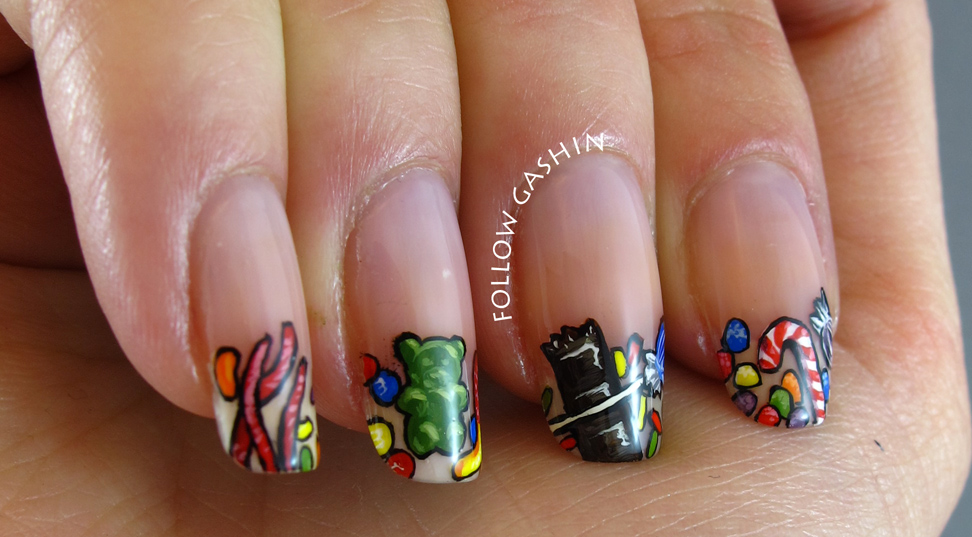
This look was inspired by the delightful confectionary nail art of @glitterfingers. Her linework style is so unique, and I love it, and I have obviously not come anywhere near it. But this is still kind of a homage to her work. (I have covered up my free edges in designs because they are irredeemably stained.)

The gummy bear is my favourite.


This began with a coat of ridge filling base coat, followed by a coat of Nail Glow. I then painted everything in acrylics and sealed it all with Seche Vite.


Polishes used:
Essie - Ridge Filling (base coat)
Dior - Nail Glow
acrylic paints in pretty much every colour
detail brush and überdetail brush
Seche Vite (top coat)

What do you think of this one? Worth the effort??


J.

Sunday, 28 April 2013

SIMPLE(R) SUNDAY: Batfight!

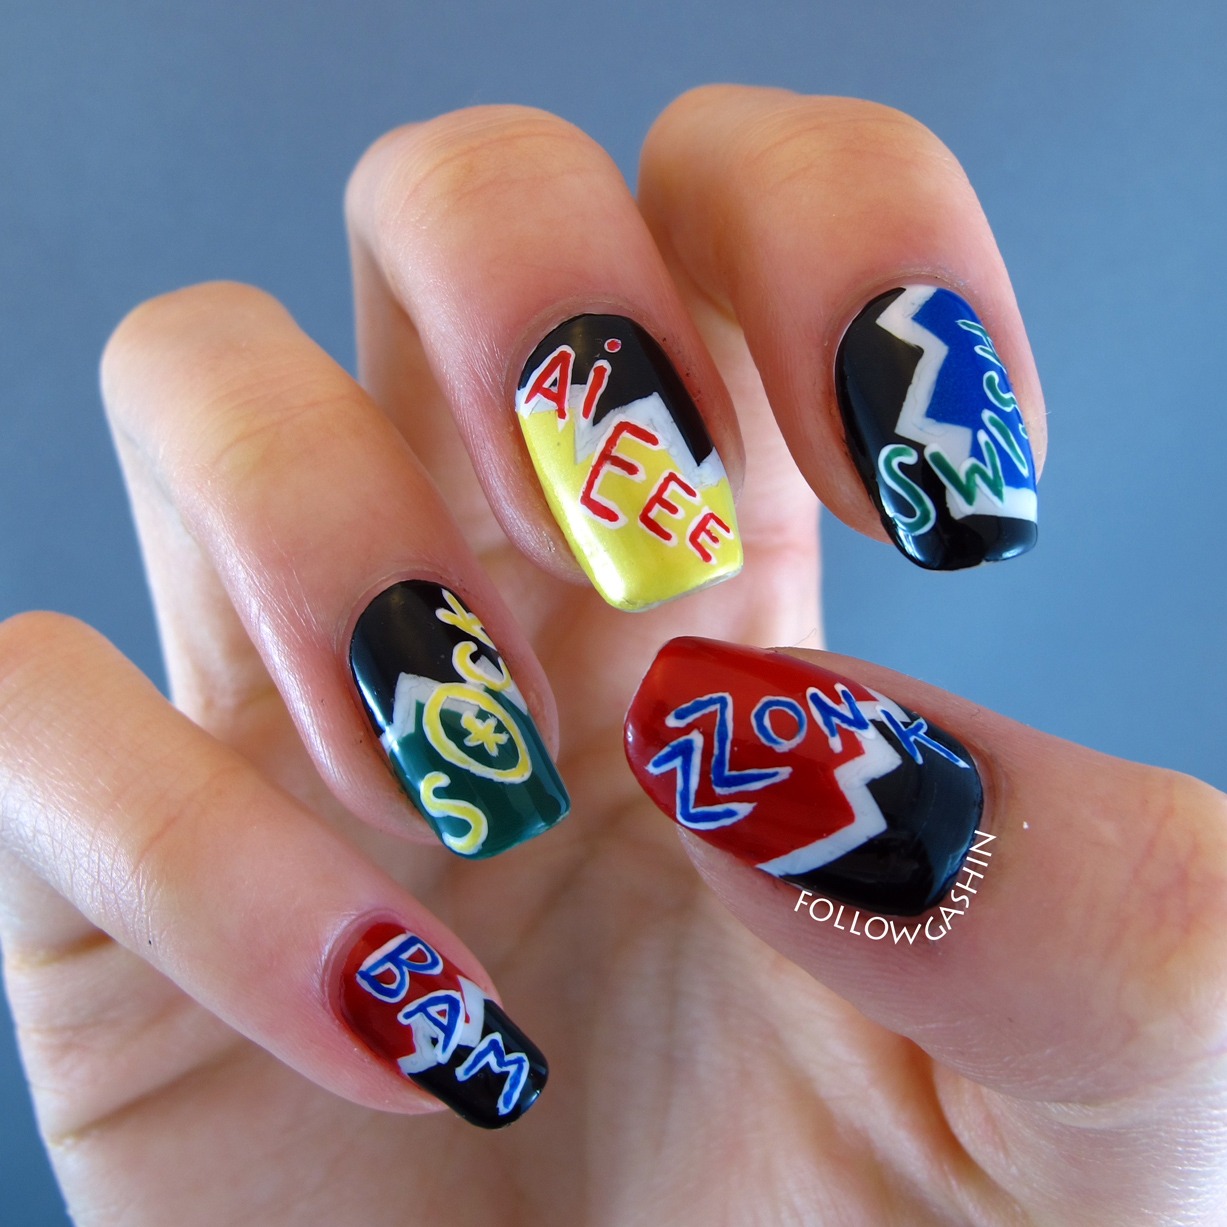
Today's nails were inspired by a few things: first, @glynnavyre on Instagram wanted to see explosion nails; second, I'm headed down to Calgary today for the Fan Expo; third, my friend Jen insisted, upon the occasion of our last hanging out, that we watch the scene in the good ol' Adam West Batman movie wherein he is struggling somewhat underwhelmingly with an inflatable shark affixed to his leg.


It was a good scene.

ZZONK is a real thing; I saw a screencap of it!!

To do this look, I used the explosion mani technique (YouTube it, it's all over the place) and simply added words in a combination of white acrylic paint and nail polish.

This is my favourite one.

Polishes used:
Layla - Velvet Effect 08
OPI - My Boyfriend Scales Walls, Jade is the New Black
Revlon - Electric
Zoya - Tallulah
GOSH - Nero
Duri - Rejuvacote (base coat)
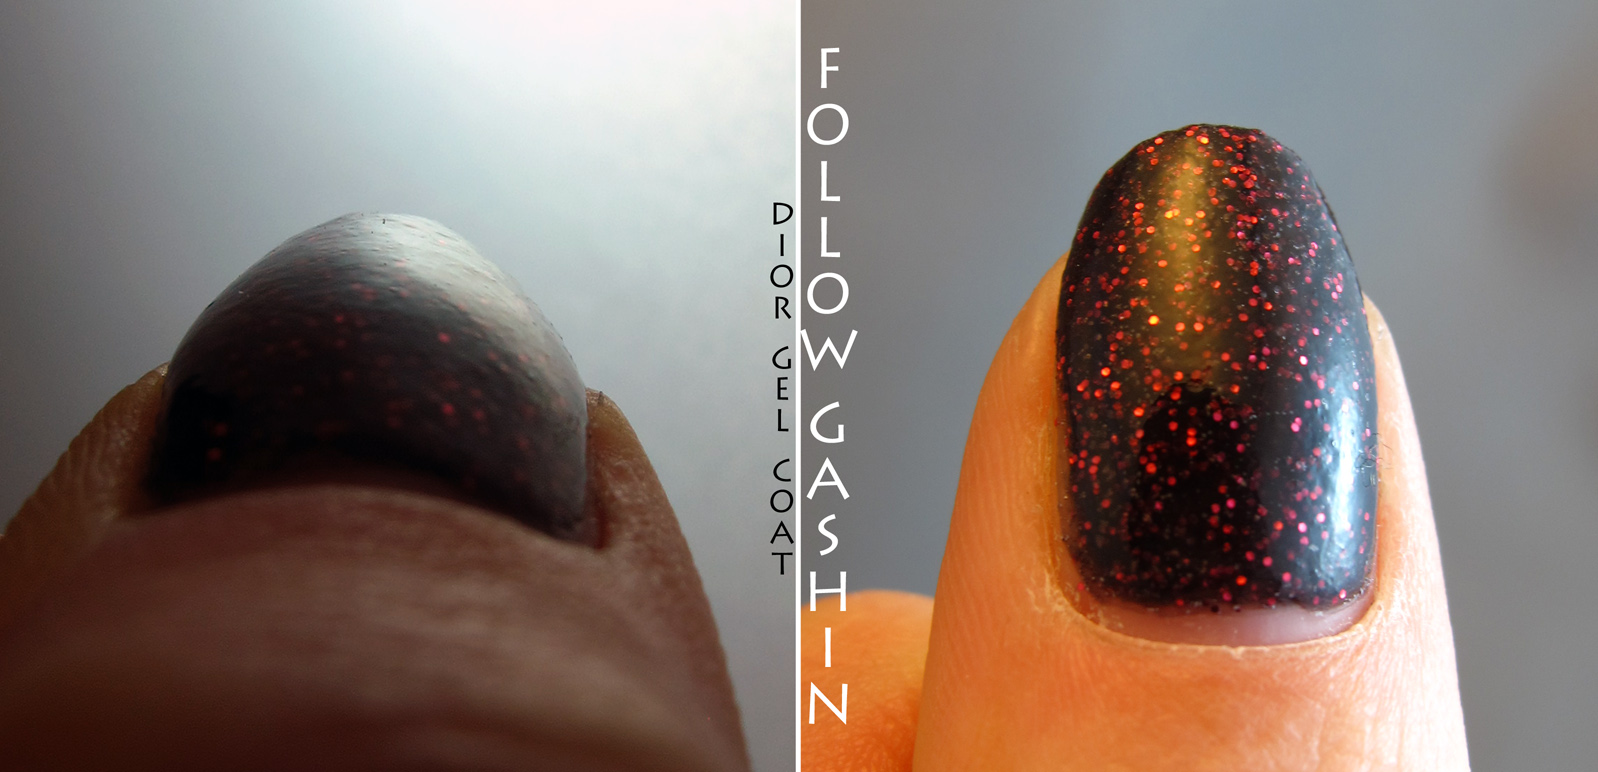
Dior - Gel Coat (top coat-- AND LOOK AT THE SHRINKAGE, SWEET RHUBARB PIE)

All the delightful geekery in the world to you!


J.

Thursday, 25 April 2013

Beachy Watermarble (Learning Curve Ahoy!)

Hello lovelies!

Today I tried my hand at watermarbling. I did exactly four fingers and then threw in the towel. People who can watermarble with ease are astounding and awe-inspiring and I am definitely not among them. I'd prefer to paint little Yodas and go cross-eyed. Doing this made me want to build a time machine just so I could go a couple of hours into the past and tell myself not to do this.


For this, I used a combination of Godiva and an acrylic wash of Van Dyke brown to get sort of a sparkly wet sand look. I then covered up all that work with my ineffectual watermarbling.

So it goes! This technique takes a lot of practice (the YouTube gurus make it look so eeeaaasssyyy ;___;) so I'm trying not to lose hope altogether.


And a detail shot to show you the abysmal little bubbles I had everywhere, the terrible clean-up job I did, and the delightful sparkly sand!


Polishes used:
Zoya - Godiva
Sally Hansen Xtreme Wear - White On, Pacific Blue, Mellow Yellow
INM - Out the Door (= the clear stripes)
Dior - Gel Coat (top coat)
acrylic paint in Van Dyke brown + wash brush (#4)
usual watermarbling accoutrements

Going for something simpler for my next look, and I have a Swatch Saturday for you tomorrow (and it's GORGEOUS, you'll see)!


J.

Wednesday, 24 April 2013

Sideways Rainbow Braid Nails

This was going to be SO GOOD. Like most things I've tried lately, it didn't quite work out that way. It's not a total disaster, it just isn't the awesomesauce I was expecting.


I've been seeing a lot of braid nails around, so I thought I'd give it a shot, but sideways, and rainbow. All things are usually better when rainbow. A lot of the colour variations aren't showing up in the photos (especially the pinky; those are 3 very distinct colours of purple, not that anybody would ever know!). This was terrible to clean up, so please don't examine my cuticles-- they're a war zone. :P


And then I bumped my ring finger and pinky while making dinner. Sadpanda.


Polishes used:
Layla - Softouch Effect 08
Inglot - 724
Sally Hansen Insta-Dri - Pronto Purple, Cinna-Snap
Essie - Action
American Apparel - Lopez Canyon, Sunshine State, Crescent Heights
OPI - My Paprika is Hotter than Yours
Zoya - Shawn, Sylar, Mira
Revlon Top Speed - Electric
Duri - Rejuvacote (base coat)
Sally Hansen Insta-Dri (top coat)
Dior Gel Coat (top coat)

Until my next outrageous and unfulfilled adventure, my darlings!


J.

Sunday, 7 April 2013

Iron Polish: Glitter Food Edition

WELCOME TO MANICURE STADIUM


(please don't sue me)

I own a lot of top coats that are intended to smooth out glitter. As many know only too well, glitter can be very 'hungry' and gobble up endless coats of topcoat without batting a proverbial eye, all while remaining rough like taunting sandpaper. There's a small industry within the nail community dedicated to finding ways to smooth out dem glitterbombs, and today I'm weighing in on 10 of them.


For this epic showdown, I began by painting two coats of OPI's Stay the Night on each finger-- because this is a 'first formula' Liquid Sand polish, it is VERY textured, and therefore a good candidate. I then painted on two coats of each type of 'glitter food', using what I would call medium/generous coats (neither thin, nor glooping it on). I then waited an hour, evaluated what the glitter was feeling like, and recorded it. I thereafter went to sleep for about 7 hours, woke up, and recorded once more how the glitter was feeling. Results are below (pardon the dry cuticles in the photos; I was running around that morning and forgot to prep for photos properly).

A few notes: I've done some swapping out, so now my Seche Vite, Poshé top coat, and Good to Go are all slightly thickened, but only as much as would be considered 'average' (not brand new, not in need of any polish thinner whatsoever, able to be applied in a floating manner but do not typically produce shrinkage). I have not evaluated these top coats for drying time; the only one I noticed took longer to dry than the others was the Maya Cosmetics one-- it got some ridges overnight that the others did not, but not due to the product settling into the glitter. I've therefore evaluated it based on its general characteristics, not the ridged spot.

LEFT HAND, THUMB TO PINKY: Gelous, Poshé top coat, Nail'd It Glitter Frosting, Maya Cosmetics Smoothing Coat for Glitter, Seche Vite

RIGHT HAND, THUMB TO PINKY: Dior Gel Coat, Nail Pattern Boldness Glitter Food, Poshé base coat, Essie Good to Go, INM Out the Door

INITIAL IMPRESSIONS: Good to Go and Seche Vite are the same, two coats give good smoothness after about 20 minutes; Nail Pattern Boldness does not self-level; Maya and Dior both seem to be working, but have created a multitude of little air bubbles between each piece of glitter.

AFTER AN HOUR:
Gelous - gritty
Poshé top coat - relatively smooth
Nail'd It Glitter Frosting - semi-gritty
Maya Cosmetics Smoothing Coat for Glitter - very smooth
Seche Vite - relatively smooth
Dior Gel Coat - very smooth
Nail Pattern Boldness Glitter Food - super smooth
Poshé base coat - gritty
Essie Good to Go - very smooth
INM Out the Door - gritty

AFTER 7 HOURS:

Gelous - gritty:


Poshé top coat - 85% smooth, very small amount of shrinkage:


Nail'd It Glitter Frosting - gritty:


Maya Cosmetics Smoothing Coat for Glitter - semi-gritty, lots of bubbles!:


Seche Vite - 80% smooth:


Dior Gel Coat - 95% smooth:


Nail Pattern Boldness Glitter Food - 95% smooth, would be 100% with shiny top coat:


Poshé base coat - gritty:


Essie Good to Go - 80% smooth:


INM Out the Door - gritty:


I hope this comparison has been useful to you! I have another one like this planned, to compare quick-drying top coats, but if there's anything else you'd like to see in this vein (i.e. no colour comparisons, I don't have a big enough stash to be useful on that front!!), please let me know!


J.
 
SITE DESIGN BY DESIGNER BLOGS